Non-contact temperature measurement on metal surfaces via infrared
To comply given temperatures is a process and quality defining factor during almost all industrial production stages. Contactless measuring infrared thermometers are well known for temperature measurements. This also applies for the measurement of metals. A proper monitoring and control of process temperatures requires very good guidance by the producer or basic knowledge regarding the measurement techniques on the part of the customer. Important parameters, like emissivity and reflection as well as out of these resulting causes for measuring mistakes, will be explained in the following article. The influence on the measurement of metals will also be shown and it will be presented why a reliable and reproducible measurement is possible.
Next to time, temperature is the most frequently measured physical property. Infrared temperature measurement devices define temperatures through the infrared radiation delivered by the object – without contacting the object. But how does non-contact temperature measurement work? What are the challenges of measuring metallic surfaces?
The infrared radiation array
Each body, with a temperature above the absolute zero of 0 K (-273.15°C) emits an electromagnetic radiation from its surface which is proportional to its intrinsic temperature. The infrared radiation array covers only a limited part within the total electromagnetic radiation array. It starts at the visible range of about 0.78 μm and ends at wavelengths of approximately 1000 μm. Wavelengths ranging from 0.7 to 14 μm are important for infrared temperature measurement. Above these wavelengths the energy level is so low, that detectors are not sensitive enough to detect them as you can see in the illustration.

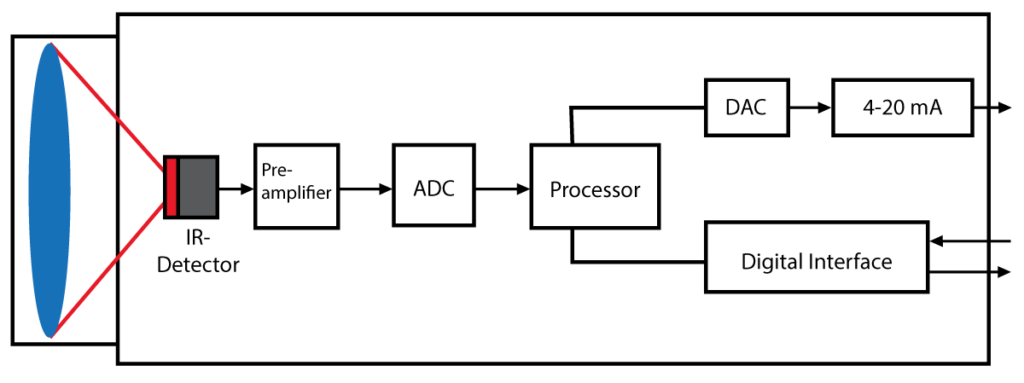
The radiation of the body penetrates the atmosphere and can be focused on a detector element with the help of a lens. The detector element generates an electrical signal proportional to the radiation. This signal is amplified and, using successive digital signal processing, is transformed into an output signal proportional to the object temperature. The measuring value can be shown on a display or released as a signal.
Standardized outputs to pass on measurement results to control systems are available in form of linear 0/4-20 mA, 0-10 V and as a thermocouple signal. Furthermore, the most of the presently used infrared thermometers offer digital interfaces (USB, RS232, RS485) for further digital signal processing and in order to be able to have access to the device parameters.
The behaviour of infrared radiation on metal surfaces is examined in more detail in the following paragraphs. Prior, the detector and the conversion of the signal into an object temperature will be presented.
Temperature calculation via infrared radiation
The detector as a radiation pick-up identifies the most important element of each infrared thermometer. A signal originates through an appearing electromagnetic radiation which is completely evaluable. The detector signal U is connected with the object temperature TObject as follows:![]()
The detector signal which results from the emitted radiation of an object within the total radiation array, increases proportional to the fourth power of the absolute temperature of the object. This means: If the temperature of the measuring object doubles, the detector signal will than increase by factor 16.
The formula changes, as the emissivity ε of the object and the reflecting ambient radiation of the object surface TAmbient as well as the self radiation of the infrared thermometer TPyro need to be taken into account as well:![]()
Furthermore, infrared thermometers are not working within the entire radiation array. The exponent depends on the wavelength. N stands for the wavelength from 1 to 14 μm in the range of 17…2, for short-wave measuring devices for the temperature defining of metal (1.0 to 2.3 μm) the range is between 15…17:![]()
The object temperature arises due to a shift of the last mentioned formula. The results of these calculations are saved as an array of curves withing the EEPROM of the infrared thermometer for all occurring temperatures:
![]()
Therefore infrared thermometers are receiving enough signal for the temperature measurement. From the formula one can see that besides the wavelength range (radiation array), the reflecting ambient radiation as well as the emissivity are of centrality for accurate temperature measurement. The importance of these parameters will be derivated and explained hereafter.
The black body as an importance reference
Already around 1900 Planck, Stefan, Boltzmann, Wien and Kirchhoff defined the electromagnetic spectrum in more detail and established qualitative and quantitative coherences for the description of infrared energy. The black body forms the basis for the understanding of the physical basics of non-contact temperature measurement technology and for the calibration of infrared thermometers.
On the one hand site, the black body is a body that absorbs all occurring radiation. Neither reflection (ρ = 0) nor transmission (τ = 0) appear on the body. On the other hand, the black body emits a maximum of the possible energy for each wavelength, depending on its own temperature. The construction of a black body is simple. A thermal hollow body has a small hole at one end. If the body is heated and reaches a certain temperature, inside the hollow room a balanced temperature spreads.
The radiation law by Planck shows the basic correlation for non-contact temperature measurements: It describes the spectral specific radiation Mλs of the black body into the half space depending on its temperature T and the wavelength λ (c: light speed, h: Plank constant):

The second coherence, which is obvious from the graphic outline, is that the wavelength which consists of the maximum of radiation moves into the short-wave area during increasing temperatures. This behaviour underlies the displacement law of Wien and can be derived from Plank’s equation through differentiation.The high radiation is therefore a reason – but not the most vital one – why metal surfaces can be measured with short wavelengths at high temperatures. The long waverange consists of a high intensity as well. Emissivity, reflection and their influence on measurement errors have a much greater impact as metals are selective emitters. The high radiation is therefore a reason – but not the most vital one – why metal surfaces can be measured with short wavelengths at high temperatures. The long waverange consists of a high intensity as well. Emissivity, reflection and their influence on measurement errors have a much greater impact as metals are selective emitters.

Metal surfaces as selective emitters
In reality, only few bodies meet the ideal of the black body. In practise, radiation surfaces are used for the calibration of the sensor which reach emissivities up to 0.99 within the requested wavelength area. The object temperature can be defined through the radiation measurement of the emissivity ε (Epsilon) which states the relation of the real radiation value of the object and the one of the black body for the same temperature. The emissivity is thereby always between zero and one; the missing radiation partis compensated through the indication of the emissivity.
Many to be measured surfaces consist of a constant emissivity throughout the wavelengths but emit less radiation compared to the black body. They are called grey body. A number of non-metallic solids show a high and relatively constant emissivity in the long wave spectral range independent from their surface condition.
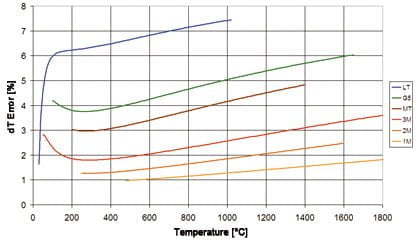
Objects , e.g. metal surfaces, whose emissivity depends amongst others on the temperature and the wavelength are called selective emitters. There are a number of important reasons, why the measurement on metals should only take place within the shortwave range. First of all, metal surfaces at high temperatures as well as short wavelength (2.3 μm; 1.6 μm; 1.0 μm) do not only consist of the highest radiation but also of the highest emissivity. Secondly, they adjust to the emissivity of metal-oxides so that temperature differences, evoked by changing emissivity (heat tint), are minimized.

An other important influence on the decision of a short wave infrared thermometer is that metals, in comparison to other materials, can consist of unknown emissivities. Short wave devices are substantially reducing the measurement errors at wrongly adjusted emissivities.
Reproducible measurements despite reflection
The lower the emissivity of a surface, the more reflectedradiation the infrared thermometer receives from theenvironment. As most of the bodies, like metals, do notconsist of a transmission within the infrared range, thefollowing formula applies:
ε + p = 1
In this case, ε is the emissivity and ρ the reflection. The infrared radiation, which is evaluated by the device and converted into temperatures, is not only influenced by the emissivity of the metal surface (and the compensated radiation share) but also crucial through hot objects in the surroundings (TAmbient) such as components and ovens.
The parameter TAmbient must be considered more carefully the lower the temperature of the to be measured metal surface and the higher the reflected temperature from the surroundings is. The amount of reflection is de facto normally directed and therefore easy to determine.
The amount of reflection can be made out as a size and secures reproducible measurement results.
Infrared thermometers in practise: Inductive hardening and inducement processes
An example for the measurement of metal surfaces is the heat treatment over induction hardening. During this process, a component is placed in strong alternating field and there are heated and freezed into the requested structure. It is possible, to adjust the penetration of the heat into the material locally through controling of the frequency; only parts of the component are treated. The requested structure of the metal depends on a ideal temperature-time process.Therefore, it is vital to monitor the temperature permanently.
Important parameters of an infrared thermometers are:
- Sensing head is detached from the electronic box; therefore no influence of the electromagnetic field on the measurement results
- Wavelength (1.0 μm / 1.6 μm / 2.3 μm) particularly for metal surfaces
- Surrounding temperature compensation (TAmbient), e.g. through reference temperature
- Reliable temperature measurement of metals from 50°C up to 1800°C
- Fast temperature control through measurements within 1 ms
- Measurement of small components through high optical resolutions (measurement sizes starting from 0.7 mm) and spot size marking through double laser sighting
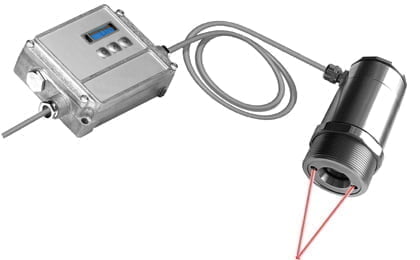
Optris infrared thermometers for temperature measurements of metal
Optris offers a broad range of metal pyrometers as well as infrared cameras for numerous applications in the metal industry.

High temperature measurement on metal
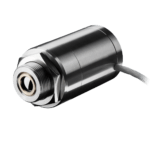
The following infrared thermometers are perfectly suited for the measuring of very high temperatures on metals, metal oxides as well as ceramics:
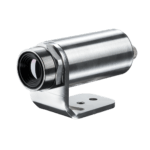
- Pyrometer optris CT 1M / 2M: 250°C … 2.200°C*
- Pyrometer optris CTlaser 1M / 2M with innovative double laser: 250 °C … 2.200 °C*
- Handthermometer optris P20 1M / 2M: 385 °C … 1.800 °C*
- Ratio pyrometer optris CTratio 1M: 700 °C … 1.800 °C
Low temperature measurements on metal
Several applications in the metal industry take place in lower temperature ranges. For these needs, Optris offers the following infrared thermometers:
- Pyrometer optris CT 3M: 50 °C … 1.800 °C
- Pyrometer optris CTlaser 3M with innovative double laser: 50 °C … 1.800 °C*
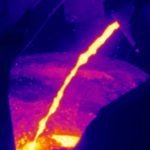
Measurement of molten metals
Thanks to extremely short measuring wavelengths, the following pyrometers are a perfect match for the temperature measuring of molten metals:
- Pyrometer optris CTlaser 05M: 1.000 °C … 2.000 °C
- Handthermometer optris P20 05M: 1.000 °C … 2.000 °C
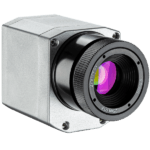
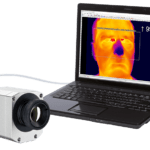
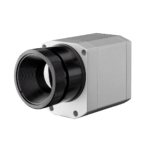
Thermal cameras for measurements on metal
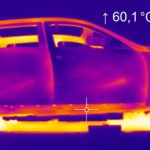
The thermal imagers of the optris PI series offer special devices for temperature measurements on metal as well, which cover the following temperature ranges:
- Infrarotkamera optris PI 1M: 450 °C … 1800 °C*
- Infrarotkamera optris PI 05M: 900 °C … 2000 °C*
